Teaching Brewing
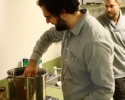
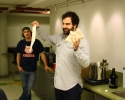
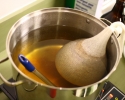
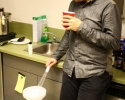
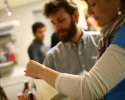
Photos from the brew courtesy of Micah Eckhardt
This Friday and Saturday the Media Lab hosted its first Festival of Learning and I volunteered to teach beer brewing. I’m hoping to use this post as a repository for some of the content covered and some of the information I skipped over in the handout. This post also should serve as an update my previous ramblings on this subject.
Thanks to Hopville’s Beer Calculus I whipped up a recipe for a fairly generic American Ale, similar to something like a Sierra Nevada Pale Ale, New Belgium Fat Tire, or Harpoon Ale.
Equipment
Possibly the greatest omission to the distributed handout was an equipment list. This is a reproduction of the equipment list I assembled to teach the class outside of my own kitchen – so it should be fairly complete.
- Beer – homebrew is best, but good commercial examples of the beer you’re brewing works too.
- Cups – useful for consuming the aforementioned beer, also for holding small samples of wort, sanitizing solution etc.
- Large pot – I think mine is somewhere around 3.5 gallon capacity, go larger if possible, it’s easy to boil over.
- Small pot – maybe around 1/2 gallon for heating water for sparging (rinsing the sugar off the grain).
- Thermometer – I actually have three thermometers, a Fluke 62 non-contact IR thermometer, a floating “candy” thermometer, and a digital meat thermometer. The meat thermometer is the most accurate, the IR is most convenient, and the candy thermometer can be left in the wort while sparging. I’d get a candy thermometer (cheapest) if I was starting out.
- Two 6 gallon carboys or buckets – used for the primary and secondary fermentation. We use glass carboys, but others use plastic carboys or buckets successfully. Be sure not to use abrasives on plastic though, then they’ll be impossible to clean.
- Airlock and stopper – for allowing CO2 to escape while keeping the bad bugs out.
- Large spoon – used to stir the wort.
- Large Funnel – needed to get the wort into the carboy, not needed if using a wide mouth fermenter like a bucket.
- Sanitizer – we use Iodophor (no rinse), but others use bleach (be sure to rinse thoroughly) or Star San (no rinse)
- Measuring spoons – for measuring additives, spices, Irish moss etc.
- Grain/hop bag – these come in varying sizes and are sometimes reusable. I typically use a muslin bag (a few cents) for steeping the grain, but it cannot be reused.
- Hydrometer – for measuring specific gravity to calculate alcohol content.
- Oven mitts – for not burning yourself.
- Racking cane and hose – for siphoning the beer from the primary fermenter to the secondary and from the secondary to bottles or a keg.
- Bottle Capper – for crimping caps onto bottles (if bottling).
- Keg, tap and CO2 – if kegging the beer. Your keg setup could vary a lot from what I use, and is generally considered an advanced topic – only because of cost, not complexity – it is far easier to keg than bottle beer.
Recipe
I used Beer Calculus to design this recipe. Then, I put together a visualization (above) fashioned after those pioneered by Cooking for Engineers. In case the recipe was confusing, I’ve reproduced it below in a more conventional style.
Ingredients
- 1 LB Crystal 20L amber malt
- 1/2 LB Victory malt
- 1/2 LB Vienna malt
- 6 LB Amber dry malt extract (DME)
- 1 oz Magnum hops – these are used for bittering, other good choices could be Zeus or Northern Brewer, something with 10-15% Alpha Acid (AA).
- 3/4 oz Cascade hops – these are used for flavor and aroma, classic American hops, another good choice could be Willamette or Amarillo.
- 1 tbsp Irish moss – these are used to clarify the beer.
- WLP001 Yeast
- Tap water
- Bottling (corn) sugar
Procedure
- Pour 2.5 gallons of tap water into a large (3.5 gal+) pot.
- Heat water to 160° F, put grains (Victory, Vienna, Crystal 20L) in muslin grain bag and immerse bag in water. I tie the bag to the handle of the pot or to a spoon to make it easier to remove – like tying the string of a tea bag to the handle of a mug.
- Steep the grains for 45 minutes between 160° and 170° F.
- After the grains have steeped, lift the bag just out of the wort and rinse the grains with about a half a gallon of 160° F water. This process is called sparging.
- Add the malt extract (DME) and heat to a boil.
- When a boil has been reached, pitch the Magnum hops. Watch the wort to ensure it does not boil over.
- While the wort is boiling, sanitize the carboy, funnel, airlock and stopper. Follow the directions on the Idophor for making a solution. Fill the carboy with sanitizing solution, fill a pot (or bucket or something) with solution to soak the stopper, airlock, funnel, etc.
- Boil the wort for 30 minutes and add 3/4 ounce of Cascade hops.
- Boil for another 25 minutes and add another 1/2 ounce of Cascade hops. Also add 1 tbsp of Irish moss (for clarity).
- Boil another 5 minutes and turn off the heat.
- Put the lid on the pot. Prepare an ice bath in a large sink or bucket. Place the pot in the ice bath. Cool to around 70° F – around 30 minutes.
- Empty the sanitizing solution from the carboy and pour the chilled wort into it. Pour roughly to aerate the wort, the yeast needs oxygen to work.
- Top the wort off to five gallons with tap water.
- Pitch the yeast into the carboy and give it a small stir to incorporate the wort with the water and the yeast.
- Put the stopper on the carboy, fill the airlock with tap water, put the airlock into the stopper. Place the carboy in in a cool dark place for a week or so, or until the bubbles have slowed around one per minute.
- Clean and sanitize a second carboy. Siphon the beer from one carboy to the other avoiding the sediment, attach the stopper and airlock, let the beer rest for a few weeks.
- If bottling, clean and sanitize 50 bottles, prepare a bottling sugar solution 3/4 cup corn sugar and 1/2 gallon of water, add to the beer. Check Palmer’s page for reference.
- Siphon the beer to bottles (ugh) or a keg (yay!)
- Enjoy!
Resources
There are plenty of good references for brewing, the best being local homebrewing clubs or stores. All of my references are centered around Cambridge, MA, though I can also give references for Atlanta, GA if asked.
Books
- Palmer, How to Brew
- Pappazian, Complete Joy of Homebrewing
Websites
- Palmer’s How to Brew companion page.
- Home Brew Talk forums
- Beer Advocate for beer reviews and other awesomeness
Bars & Homebrew Stores
- Homebrew Emporium – outside of Porter Square
- Lord Hobo
- Meadhall
- Brickstore Pub – my favorite bar but in Atlanta





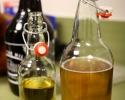


Second the Brickstore Pub 🙂